TIBCO | JNDI Server & JMS Instance creation
In this post we will be creating TIBCO JNDI server and other instance pointed to JNDI server. First lets see what is mean by JNDI. It is Java API for a directory service that allows Java software clients to discover and look up data and objects via a name. TIBCO EMS uses JNDI concept to lookup for EMS objects and its relations in messaging service.
While developing enterprise level TIBCO solution it is advise or say standard practice to create one JNDI server(also one backup JNDI server) and other instance servers according to the functionality or domains. In this tutorial we will be creating one JNDI server and two domain servers.
So the concept is simple. JNDI server maintains the EMS factory's whereas domain servers maintain Queues and Topics. Message from other system to TIBCO system come via JNDI and routed to particular domain based on factory it is using. Please check below diagram for more details.
One of the advantages of creating one JNDI server and multiple domain ems servers is that it increases performance as load on single instance of ems is reduce. Also we can create message stores on each server for queues. It also provides limited access to requester by limiting its access only to particular instance and queues.
We are using below details :-
JNDI server - Port 7222
Rohan server - Port 7223
Oliver server - Port 7224
Step 1 : Create a TIBCO EMS server using config file and name it as JNDI server in config file.
Edit the tibemsd.conf file in ems\data folder and re-name data folder to JNDI.
Path - C:\ProgramData\TIBCO_HOME\tibco\cfgmgmt\ems\data
server = JNDI-EMS-SERVER
Step 2 : Create two factories on JNDI server
Create factories using ems command or via editing factories.conf file in same folder
create factory rohan queue URL=tcp://localhost:7223
create factory oliver queue URL=tcp://localhost:7224
OR
OR
[rohan]
type = queue
url = tcp://7223
[oliver]
type = queue
url = tcp://7224
Step 3 : Create domain EMS servers
Copy the config files which used for JNDI server creation(folder JNDI) and create two new folders in same directory JNDI. Named them according to domain. eg rohan, oliver
Now edit the tibemsd.conf file to rename the server according to domain. Also update the paths of stores, users in tibemsd.conf file.
Step 4 : Now run all three servers using cmd.
tibemsd -config "folder path of conf file"
Step 5 : Now create TIBCO BW Process and test.
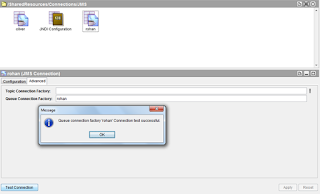
In BW project we will be creating One JNDI connection object and two domain EMS server objects. Provide EMS details(URL and factory)and test the connection.
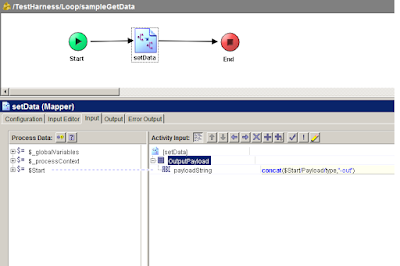
Now create simple BW Processes using JMS sender and receiver activity.
If you observe the output of JMS sender process, you may notice that message is routed to Oliver Server(Check output message id property)
Same you will observe for JMS receiver activity. Each message received belongs to different domain ems connection.
Now we have successfully implemented TIBCO JNDI server creation activity.


Comments
Post a Comment